Ok, most of ya'll already know that I've been on a quest to lose weight....a little over 100 pounds. Well, I've been losing slowly but still have a way to go. But I've also come to the realization that it's not just about the weight. It's about being healthy. And through Herbalife I've found that. I may still have quite a bit of weight to lose....but I've never felt better in my life. Yes, I've been on and off the Herbalife weight loss plan....but I've remained with the nutritional supplements. And I can say they make a TON of difference in the way I feel from day to day.
One of the things I love about Herbalife is the fact that it is not promoted as that quick fix weight loss product. All around health and nutrition is what is promoted. And we all know that those quick fix weight loss gimmick type products don't keep the weight off anyway. It's all about LIFESTYLE changes and that is what is promoted with Herbalife....lifestyle change to get healthy and remain healthy.

Monday, February 20, 2012


Friday, February 10, 2012
Rejoined Stampin' Up....WooHoo!!!
I just rejoined Stampin' Up as an Independent Demonstrator today. YAY!!!
Check out my new SU website at http://melhand.stampinup.net
Check out my new SU website at http://melhand.stampinup.net
Wednesday, February 8, 2012
Stampin' Up Again
Yes, I am going to be rejoining Stampin' Up as an Independent Demonstrator once again. I just can't stay away from SU. LOL So as soon as I get it all organized I will be posting lots of pics, workshops and classes.
Just an FYI...I will NOT be removing old posts that contain artwork from other companies....they were there before me re-joining SU so they will stay. However, nearly all stamp related projects from this point forward will be SU related. I will also be working on recreating some of my old projects using other stamp company products with SU products just to show versatility in design.
Just an FYI...I will NOT be removing old posts that contain artwork from other companies....they were there before me re-joining SU so they will stay. However, nearly all stamp related projects from this point forward will be SU related. I will also be working on recreating some of my old projects using other stamp company products with SU products just to show versatility in design.
Tuesday, November 8, 2011
Long time no see....
Wow, it's been soooo long since I've even been to this page. I will have to post an update this afternoon. Watch out ya'll.....I will be posting an update soon so we can get this place rockin' again. :-)
Sunday, October 25, 2009
"JOY" Coaster Wall Hanging
Hey ya'll,
I've been playing around a little this weekend. I put together this project using a combination of Elemental Stamping technique by Elemental Doodles and Doodle Imaging by one of ED's DT members (Cat).
 Supplies Used:
Stamps - Elemental Doodles (new releases)
Chipboard Coasters X 6 - Elemental Doodles
Inks - Versa Magic & Brilliance
Accessories - Blue grosgrain ribbon, Hot Glue, Crystal Glitter, 2-Way Glue Pen, Stickles Glitter Glue, finger daubers
Instructions:
1. Pencil in the letters JOY on coasters.
2. Finger Dauber ink color over penciled in letters.
3. Stamp filler image over penciled letters.
4. Stamp Holly image in various places over letter.
5. Stamp accent image in various places.
6. Finger dauber ink around coaster edge.
7. Stamp filler image and holly around coaster edge.
8. Using 2-Way glue pen, add glitter to coaster edge.
9. Dot Stickles over letters.
10.Attach ribbon to back of coasters.
11.Attach 2nd set of coasters to back to hide the ribbon and glue.


I've been playing around a little this weekend. I put together this project using a combination of Elemental Stamping technique by Elemental Doodles and Doodle Imaging by one of ED's DT members (Cat).
Supplies Used:Stamps - Elemental Doodles (new releases)
Chipboard Coasters X 6 - Elemental Doodles
Inks - Versa Magic & Brilliance
Accessories - Blue grosgrain ribbon, Hot Glue, Crystal Glitter, 2-Way Glue Pen, Stickles Glitter Glue, finger daubers
Instructions:
1. Pencil in the letters JOY on coasters.
2. Finger Dauber ink color over penciled in letters.
3. Stamp filler image over penciled letters.
4. Stamp Holly image in various places over letter.
5. Stamp accent image in various places.
6. Finger dauber ink around coaster edge.
7. Stamp filler image and holly around coaster edge.
8. Using 2-Way glue pen, add glitter to coaster edge.
9. Dot Stickles over letters.
10.Attach ribbon to back of coasters.
11.Attach 2nd set of coasters to back to hide the ribbon and glue.


Wednesday, October 21, 2009
Holiday ATC & Moo's
I am so excited......I had time to play a little with our new stamps before going to work tonight.
 The ATC is made by matting 2 Moo's onto an ATC size piece of brown shimmer CS by The Paper Company. All images are Elemental Doodles. Both of the Moo's are sprayed with Cafe Late Scent-A-Mist (a new scented shimmer spray by Elemental Doodles). Inks used are Versa Magic and Versa Fine. Moo's on the ATC are dotted with Stickles.
 The Moo is also matted on brown shimmer CS. All images are also Elemental Doodles. Inks used are Versa Magic and Versa Fine. Also dotted with Stickles.
 The ATC is made by matting 2 Moo's onto an ATC size piece of brown shimmer CS by The Paper Company. All images are Elemental Doodles. Both of the Moo's are sprayed with Cafe Late Scent-A-Mist (a new scented shimmer spray by Elemental Doodles). Inks used are Versa Magic and Versa Fine. Moo's on the ATC are dotted with Stickles.
 The Moo is also matted on brown shimmer CS. All images are also Elemental Doodles. Inks used are Versa Magic and Versa Fine. Also dotted with Stickles.
Monday, October 19, 2009
Coaster Ornaments
Wow, it's been a long time since I've posted here. Been so busy that I've just not had much time to keep up with my own blog. LOL Below are a couple of coaster ornaments that I did over the weekend. I will get instructions and exact colors of inks used posted very soon (I didn't write them all down LOL).


All stamps used are from Elemental Doodles' new stamp sets (they are available for pre-order now and are on sale....check out their website at http://www.elementaldoodles.com/ ). The coasters and acrylic rods and new release stamps and the new Scent-a-Mists are all on sale until the end of October.
Monday, June 22, 2009
Design Team Call - Elemental Doodles
 Elemental Doodles is having their 2nd Design Team Call since they launched in March 2009. Please be sure to visit http://www.elementaldoodles.com/pages/designteamcall.php for more information on how you can be a part of their next DT. ED has a lot of new and innovative products that will be introduced in the next several months and you will NOT want to miss out on the opportunity to be the FIRST one to play with new products and stamps. :-)
Monday, June 8, 2009
Pre-Order Special - Elemental Doodles

Pre-Order Special Offer ~ LIMITED TIME OFFER!!!!!
Elemental Doodles is rolling out 8 new sets of images (among other new products) on June 15th, 2009.
Pre-Order your sets today and receive a 20% discount. Just enter the voucher code: NewRelease609 at checkout.
Go to www.ElementalDoodles.com , click on Catalog in the left side navigation, click on Stamps in the body of the Catalog page, click on New Releases and then select the sets you want to add to your cart.
When you enter this code in the cart you MUST click the RECALCULATE button at the bottom so that the cart will apply the discount. Otherwise, the discount will not be applied. All orders will ship as soon as the first run is received (expected delivery date into the ED office is between June 15-June 20th, 2009.
Pre-Order Special will end June 11, 2009
Elemental Doodles is rolling out 8 new sets of images (among other new products) on June 15th, 2009.
Pre-Order your sets today and receive a 20% discount. Just enter the voucher code: NewRelease609 at checkout.
Go to www.ElementalDoodles.com , click on Catalog in the left side navigation, click on Stamps in the body of the Catalog page, click on New Releases and then select the sets you want to add to your cart.
When you enter this code in the cart you MUST click the RECALCULATE button at the bottom so that the cart will apply the discount. Otherwise, the discount will not be applied. All orders will ship as soon as the first run is received (expected delivery date into the ED office is between June 15-June 20th, 2009.
Pre-Order Special will end June 11, 2009
Monday, May 25, 2009
Website Update
In addition to the "new look" that I posted about previously, I have added a lot of new information and some pictures to my gallery on my personal website www.javamels.com . This site is not just about stamping. There's lots of information about chocolate, coffee, stamping, nutrition & weight loss (coming soon) and much more. I will also be adding a new "cafe" to my site very soon titled "Marriage Cafe". I just feel so strong about marriage and keeping families together that I felt moved to work on an online "support" for married couples. Family is an institute that God created and it's one that is worth fighting for and keeping together. So watch for this coming soon.
I have also added a guestbook to my site.....please stop by and leave your comments, suggestions and requests.
I have also added a guestbook to my site.....please stop by and leave your comments, suggestions and requests.
Sunday, May 24, 2009
Magnetic Plaque Gift for Mom
Ok, so this project has absolutely NO STAMPING whatsoever on it. But I wanted to share. My mom got divorced and remarried in 2008 and I am just NOW getting around to doing something for her and her new hubby. Yeah, I know, I'm pathetic. LOL Anyway, I snagged this idea from my good friend and business partner, Kim. She gave me something similar only minus pictures and I just thought it would make a great belated wedding gift for mom and Walt.
 Supplies used to create this are as follows:


 Supplies used to create this are as follows:
- Metal plate things from Lowe's Home Improvement (I forget what they are called but they have lots of holes in them and are kind of thick).....you need 3 or 4 of these depending on how long you want the plaque to be....I used 3.
2 or 3 colors of CS that contrast each other.
Paper flower petals
Magnets
Ribbon
Tin Name plates and tin squares
Spellbinders in various shapes and sizes.
Other embellishments of your choice. I used colored wire, a mini clipboard, mini paper clips, etc. Adhesive, Stickles, pictures, etc. Rhinestone shapes
Directions:
- Cut CS to fit the metal plates and adhere with adhesive roller.
- Cut out photos and matting for behind them using Nestabilities or other die of your choice and then assemble.
- Add magnets to the back of photos.
- Add paper flower embellishments at this time if you plan to do so.
- Remove adhesive squares from back of tin name plates and tin squares and put a magnet on them instead.
- Adhere rhinestone shapes to tin squares.
- Write or stamp what you want on the tin nameplates. I just used black permanent marker and then went over the writing with Diamond Stickles.
- Add photo to mini clipboard if you are using one.
- Using the Crop A Dile, punch holes in the corners of each metal plate through one of the holes and then line up the tin plates with the top and bottom and punch holes so they can be attached.
- Make large wire jump rings using a heavy gauge wire. These will be used to feed through the holes and attach each section to each other. This is also used to attach the tin name plates to the top and bottom.
- Attach all sections using the jump rings.
- Make wire spirals (if this is what you are using as embellishment) using various colors of wire. Attach these to the jump rings and name plates as desired.
- Punch 2 holes at the top of the top nameplate and feed your ribbon through them and tie in a knot.
- Punch holes at the bottom of the bottom tin nameplate and add another photo if desired.


Saturday, May 16, 2009
New Look
WooHoo.....I am so excited. I have a completely new look for my logo image and my main website. All the graphics and website template are from Scrapless Creations . Be sure to stop by her site as there are so many wonderful website templates available and her prices are so very reasonable. AND, she's super fast at delivering your order.
Sunday, May 10, 2009
Hoppy Frog Mini Album
Hey ya'll, I bet ya'll thought I'd forgotten all about my blog and posting new projects. ;-) Well, I have been busy working (this working an outside job is sooooooo overrated. LOL). I so miss being home with my little ones and I miss having the time to stamp and play. BUT, some day I will be independently wealthy and be able to stamp and play and spend as much time with my kids as I want (yep, I'm dreaming but a girl can dream can't she????).
Ok, on to my project. This is a little mini Album or Journal...whatever you want to make of it. I really enjoyed making this and it was super easy. The most time consuming part was waiting for the stickles to dry.
 Hoppy Frog Mini Album
All supplies used are from TAC and can be ordered HERE
Supplies Used:
T2349 Hoppy Frogs Stamp Set
K409 3X3 Mini Sheet Protectors
V901 Brighten My Day Paper Pad
F919 Cotton Candy Boot Loopy Brads
B214 Lilly Anna Ribbon
F516 Crystal Stickles
F02 Tombow Markers Pastel
D91 Kokuyo Adhesive Dispenser
V222 White Ultrasmooth Cardstock
TT220 Noir Palette Pad
F83 Spring Bright Spiral Clips
Hole punches for binding and mini brad (Crop-A-Dile)
Paper Flowers in colors of your choice
Directions:
Ok, on to my project. This is a little mini Album or Journal...whatever you want to make of it. I really enjoyed making this and it was super easy. The most time consuming part was waiting for the stickles to dry.
 Hoppy Frog Mini Album
All supplies used are from TAC and can be ordered HERE
Supplies Used:
T2349 Hoppy Frogs Stamp Set
K409 3X3 Mini Sheet Protectors
V901 Brighten My Day Paper Pad
F919 Cotton Candy Boot Loopy Brads
B214 Lilly Anna Ribbon
F516 Crystal Stickles
F02 Tombow Markers Pastel
D91 Kokuyo Adhesive Dispenser
V222 White Ultrasmooth Cardstock
TT220 Noir Palette Pad
F83 Spring Bright Spiral Clips
Hole punches for binding and mini brad (Crop-A-Dile)
Paper Flowers in colors of your choice
Directions:
- Add stickles to paper flowers so they will be dry when ready to use them.
- Cut background papers to 3x3 to fit into each of the sleeves. If you use 5 of the sleeves you will get 2 mini albums per package of sleeves. YOu will then need 10 background papers per mini album.
- Cut 10 white CS papers at 2 1/2"X2 1/2" and adhere to the center of each of the background squares.
- Stamp your frog images using Noir Palette Ink Pad on the white CS in the desired location.
- Optional - Use one of the Journaling stamp sets to stamp journaling lines in the blank space beside, above or below the stamped frogs.
- Color frog images using markers.
- Add mini brad to end of frog's tongue to be the "fly".
- Check to see that flowers are dry. If so, add them to the pages you wish to add them to.
- Slip decorated pages into sleeve protectors.
- Adhere sleeve protectors together using Adhesive Dispenser and be sure to line them up correctly.
- Cut a scrap of patterned paper from Brighten My Day Pad to 1 1/2" x 3 1/4". Score lengthwise at 1/2" and 3/4" and fold. Line up on edge of sleeve protectors and punch holes in front and back so they line up with holes in sleeve protectors.
- Adhere patterned paper scrap to sleeve protectors to form the spine/binding.
- Feed ribbon through and tie in a knot or bow....cut length as needed.
- Using tiny hole punch...punch hole in center right edge of front and back pages and apply loopy brad. Tie with matching floss.
HINT: Before punching holes in scrap patterned paper for binding use a pencil to mark where the holes need to be punched. This will ensure they are in the correct position.
Tuesday, March 24, 2009
Just an Update
Whew!!!!! It has been a crazy month so far. If I survive raising 4 boys it will be nothing short of a miracle. LOL And I'm still working on this getting used to a nighttime work schedule. I'm finding it's cutting way into my creativity time. :-(
Anyway, I've been working on a few projects this week and will be posting them over the weekend. I know it's been a little while since I've posted new projects. But I have some projects using TAC stamps and ED stamps.
Coming soon (things I've been working on).......
Decorated girl's purse
Coffee Lover's cards
Fairy cards
Flower cards & ATCs & bookmarks
Anyway, I've been working on a few projects this week and will be posting them over the weekend. I know it's been a little while since I've posted new projects. But I have some projects using TAC stamps and ED stamps.
Coming soon (things I've been working on).......
Decorated girl's purse
Coffee Lover's cards
Fairy cards
Flower cards & ATCs & bookmarks
Sunday, March 8, 2009
Christian Easter ATC
Both of the ATC's below were made using the stamp set He Is Risen from Elemental Doodles. Both of these cards were so very easy to make. And a lot of fun.


Pocket Tea ATC
This card is exactly the same as the previous Pocket Tea Card that I posted. The difference is that this card was made ATC size (2.5"X3.5") and used the mini stamps from the same stamp set - Friendship Tea from Elemental Doodles.


Pocket Tea Card Share
The card below was inspired by my business partner, Kim Baker. The difference between our cards is the cardstock used and the stitching....I don't sew, she does, so I used lace and ribbon instead of stitching. LOL I will post a tutorial soon.
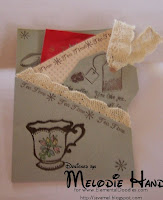
 Pocket Tea Card

 Pocket Tea Card
Supplies Used:
Stamps - Friendship Tea from Elemental Doodles
Designer Paper - Double Sided
Lace Trim
Ink - Palette Noire and Burnt Umber - TAC
Transcendence EP - TAC
Coloring Medium of choice (Twink. H2O's used here)
Acrylic Blocks
Sunday, February 8, 2009
SBS 27 - Sisters please read
Hey ya'll,
I want to personally welcome each of our SBS 27 members to the group. I do not have email addresses for all of you yet. So I'm making this announcement here on my blog with hopes that you will all see it.
I have set up a yahoogroup for SBS 27 members so that we can keep in touch with each other easier. Please be sure to send me your email address privately at mel@javamels.com or mel@elementaldoodles.com so that I can make sure you get an invite to join our group. Brenda, one of our SBS 27 members has already started putting together a birthday list for our little group. She is also going to be a moderator on our yahoogroup. So you will want to be sure to hook up with Brenda and get your birthday and mailing address to her so you can be added to the birthday list.
Please be sure to pick up your SBS 27 badge at http://sisterhoodofthebloggingstampers.blogspot.com and add it to your blog. In addition, please be sure to add the links to your other SBS 27 group sisters to your blogroll for our group. And once you have joined our little group be sure to stop by everyone's blogs and post a hello. If you are not a member of SBS 27 but would like to be please feel free to stop by the blog listed above and sign up to be included in our blogring. Members are limited to 20 and spaces are filling up fast (there are only 4 left as of the date of this post).
Thank you. I am now off to visit each of your blogs and check in with you all. :-)
I want to personally welcome each of our SBS 27 members to the group. I do not have email addresses for all of you yet. So I'm making this announcement here on my blog with hopes that you will all see it.
I have set up a yahoogroup for SBS 27 members so that we can keep in touch with each other easier. Please be sure to send me your email address privately at mel@javamels.com or mel@elementaldoodles.com so that I can make sure you get an invite to join our group. Brenda, one of our SBS 27 members has already started putting together a birthday list for our little group. She is also going to be a moderator on our yahoogroup. So you will want to be sure to hook up with Brenda and get your birthday and mailing address to her so you can be added to the birthday list.
Please be sure to pick up your SBS 27 badge at http://sisterhoodofthebloggingstampers.blogspot.com and add it to your blog. In addition, please be sure to add the links to your other SBS 27 group sisters to your blogroll for our group. And once you have joined our little group be sure to stop by everyone's blogs and post a hello. If you are not a member of SBS 27 but would like to be please feel free to stop by the blog listed above and sign up to be included in our blogring. Members are limited to 20 and spaces are filling up fast (there are only 4 left as of the date of this post).
Thank you. I am now off to visit each of your blogs and check in with you all. :-)
Saturday, January 31, 2009
Elemental Doodles Pre-Order Sale!!!!
WooHoo!!!! This is just what many of you have been waiting for. The announcement will be made on the ED blog and website this weekend but I wanted to go ahead and make the announcement with coupon code here first. :-)
Elemental Doodles is now taking pre-orders for their initial set release that is scheduled for March 2009. The Pre-Order Sale is 25% off any orders of any size that uses the coupon code below:
EDPO25
Go to www.ElementalDoodles.com , click on Catalog in the left side navigation, click on Stamps in the body of the Catalog page, click on New Releases and then select the sets you want to add to your cart. When you enter this code in the cart you MUST click the RECALCULATE button at the bottom so that the cart will apply the discount. Otherwise, the discount will not be applied.
All orders will ship as soon as the first run is received (expected delivery date into the ED office is by the first week of March if not sooner).
Elemental Doodles is now taking pre-orders for their initial set release that is scheduled for March 2009. The Pre-Order Sale is 25% off any orders of any size that uses the coupon code below:
EDPO25
Go to www.ElementalDoodles.com , click on Catalog in the left side navigation, click on Stamps in the body of the Catalog page, click on New Releases and then select the sets you want to add to your cart. When you enter this code in the cart you MUST click the RECALCULATE button at the bottom so that the cart will apply the discount. Otherwise, the discount will not be applied.
All orders will ship as soon as the first run is received (expected delivery date into the ED office is by the first week of March if not sooner).
What is an ATC?
I've had several questions about ATC's (both on the blog and privately) so here is a brief explanation.
I absolutely LOVE working on ATC's. They are miniature works of art. And the stamps from Elemental Doodles are PERFECT for making ATC's.
And ATC is an acronym for Artist Trading Card. The only requirement of an ATC is that is has to be 2.5" X 3.5". This way they will fit into trading card sleeves for those who collect them. Many artists trade these cards....many use them just to send out the same as you would regular cards. They are normally made with a CS base just like any other card. However, they can be made using any material as a base as long as the finished product is exactly 2.5" X 3.5".
I absolutely LOVE working on ATC's. They are miniature works of art. And the stamps from Elemental Doodles are PERFECT for making ATC's.
And ATC is an acronym for Artist Trading Card. The only requirement of an ATC is that is has to be 2.5" X 3.5". This way they will fit into trading card sleeves for those who collect them. Many artists trade these cards....many use them just to send out the same as you would regular cards. They are normally made with a CS base just like any other card. However, they can be made using any material as a base as long as the finished product is exactly 2.5" X 3.5".
Subscribe to:
Posts (Atom)